I use VPS Dime, and have been very please with the price and performance, but you could just as easily use AWS, Digital Ocean, or any other VPS provider.
The instructions provided here are for VPS Dime’s cheapest VPS, but once the server spins up, it makes no difference who the provider is. AWS is fairly complex and designed for enterprise clients, so the user interface is not as nice, but they do have a free tier which is more than enough to cater for most small sites.
Choose the type of VPS you would like with the sliders on the home page, and choose Buy Now! when you are happy with the price and specs.
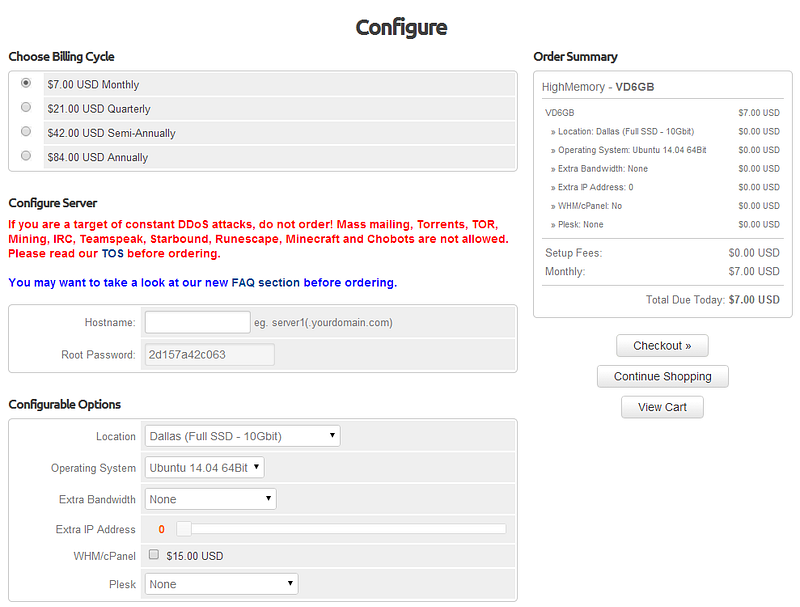
You will see the following page:

Choose an appropriate hostname (it doesn’t have to be anything linked to your website, it doesn’t matter really here, it’s just for you to identify the server). Make a note of the root password! You will need this later.
You can then choose a geographical location (eg: Dallas). Ideally, this should be as close to where the majority of your visitors will be from as possible, although the connection speed might be a factor for you.
Choose an operating system. The rest of this series is based on Ubuntu Trusty Tahr (14.04), so select either the 32 or the 64 bit version of this operating system.
We won’t be using any of the other options in this section, so you can skip it. As you become more accustomed to web development, you may decide you want to fiddle with these, but let’s ignore them for the time being.
Choose Checkout >> on the right, and pay for your VPS.
Once your VPS is provisioned (it may take a little time), head to your account details page, and find the IP address. You will use this to log in to your VPS, so make a note of it alongside the root password. If you forgot to write down your root password, most VPS hosts will allow you to retrieve it somehow.